This guide is designed to help employees navigate the Travel Desk system with ease, ensuring a smooth and efficient travel management process. Whether you’re submitting a travel request, managing expenses, or handling post-travel documentation, this manual provides step-by-step instructions to streamline your experience. From booking trips to tracking reimbursements, every feature is explained in detail, allowing you to make the most of the system with minimal effort. Follow this guide to ensure compliance with travel policies while optimizing your travel planning and financial management. Let’s get started!
Accessing the Dashboard
1. Open your web browser and navigate to the {provided link}
2. Log in to the dashboard using your assigned credentials.
Dashboard Home
1. Upon logging in, you will be directed to the Dashboard Home page.
2. The Dashboard Home page displays an overview of key metrics and quick links to other sections of the dashboard.
3. Review the metrics and click on any quick links to access specific functionalities.
Travel Desk
Locate & Select the Travel Desk ( Car icon ) section on the main sidebar of the dashboard.
Travel Requests
The Travel Request section enables employees to seamlessly plan and submit their travel requests through the Travel Desk system. Whether you’re traveling for a project, a client meeting, or an official visit, this section guides you through the step-by-step process of submitting a request, specifying travel details, and managing approvals. By providing accurate information on trip duration, travel mode, and financial requirements, employees can ensure smooth processing and hassle-free travel arrangements. This section also allows users to track the status of their requests and make modifications if needed. Follow the outlined steps to submit your travel request efficiently.
Add requests
– Step 1: Locate & Select the Add Request section on the sidebar of the page under the subsection Travel Requests under the section Travel Desk
– Step 2: Employee details are pre-defined and displayed on the page. Click next on the employee details page.
– Step 3: Enter the following details on the form for Project details:
- Specify Unit name.
- Specify Purpose of Visit.
- Select the Project according to your Unit selection
- Specify the Total days of the visit.
– Step 4: Enter the following details on the form for Travel details:
- Specify Travel type.
- Specify Travel date.
- Check box for Travel requirement is optional
- Select mode of Travel ( If travel requirement is there )
- Specify Departure from location.
- Specify Arrival at location.
- Specify Travel Class.
- Specify Booking type.
- Mention remarks or requests if any for Travel mode details
- Mention remarks
( The same can be done if the return ticket requirement is also there )
– Step 3: Enter the following details on the form for Imprest details:
- Add Project expenditure ( List of expenditure categories will be visible )
- Check box for Per day expenditure can be selected if applicable
- Specify Amount & Remarks
- ( Once all the expenditures are specified total imprest details will be visible below )
- Specify the initial requested Amount.
- Select Transfer type.
- Specify Your bank details in the text box.
– Step 3: Once all details are finalized, the Employee can click on save to register the Travel request. All the applied Travel requests and statuses can be seen on the View request page.
All the canceled Travel requests can also be viewed on the Canceled requests page if ethe mployee chooses to cancel any particular travel request.

Additional Travel

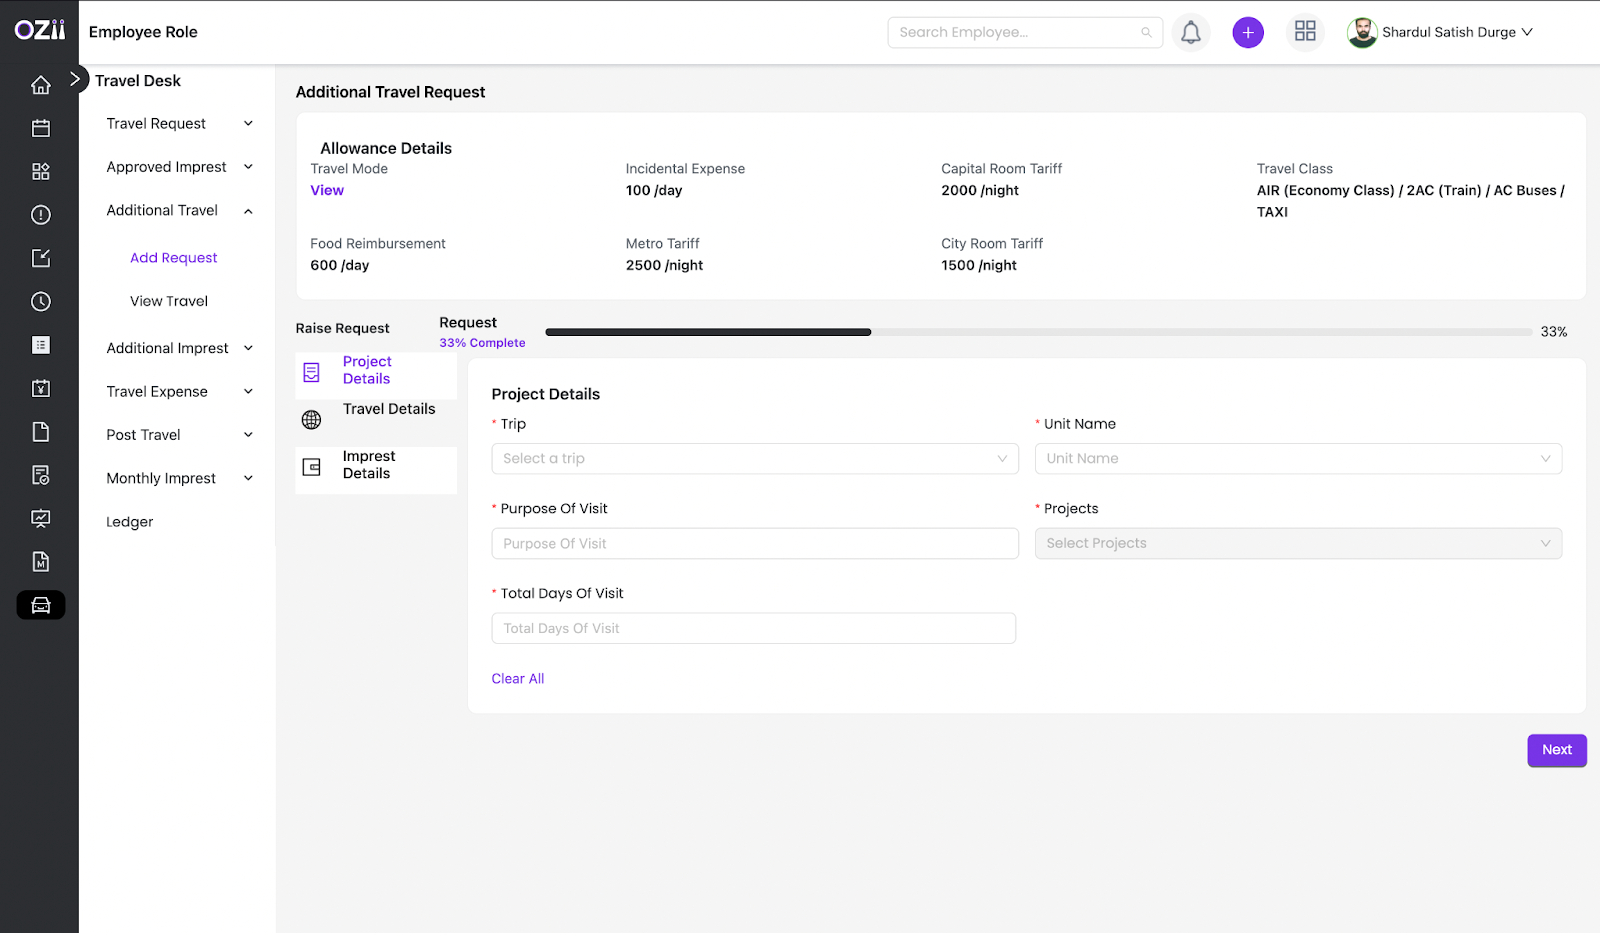
The Additional Travel Request section allows employees to request modifications or extensions to their original travel plans. Whether an unexpected meeting arises or an extension is required for an ongoing project, this section provides a streamlined process to submit and manage additional travel requests. Employees can specify trip details, travel mode, and financial requirements while ensuring proper approvals and compliance. This feature ensures flexibility in travel planning while maintaining transparency and efficiency. Follow the step-by-step instructions to submit your additional travel request with ease.
Additional Travel Request
– Step 1: Locate & Select the Additional Travel request section on the sidebar of the page under subsection Additional Travel Requests under section Travel Desk
– Step 2: Enter the following details on the form for Project details:
- Select Trip
- Specify Unit name.
- Specify Purpose of Visit.
- Select the Project according to your Unit selection
- Specify Total days of visit.
– Step 3: Enter the following details on the form for Travel details:
- Specify Travel type.
- Specify Travel date.
- Check box for Travel requirement is optional
- Select mode of Travel ( If travel requirement is there )
- Specify Departure from location.
- Specify Arrival at location.
- Specify Travel Class.
- Specify Booking type.
- Mention remark or requests if any for Travel mode details
- Mention remarks
( The same can be done if return ticket requirement is also there )
– Step 3: Enter the following details on the form for Imprest details:
- Add Project expenditure ( List of expenditure categories will be visible )
- Check box for Per day expenditure can be selected if applicable
- Specify Amount & Remarks
- ( Once all the expenditures are specified totals imprest details will be visible below )
- Specify Intial requested Amount.
- Select Trasnfer type.
- Specify Your bank details in the texts box.
– Step 3: Once all details are finalized, the Employee can click on save to register the Additional Travel request. All the applied Additional Travel request and statuses can be seen on the View Additional Request page.
Approved Imprest
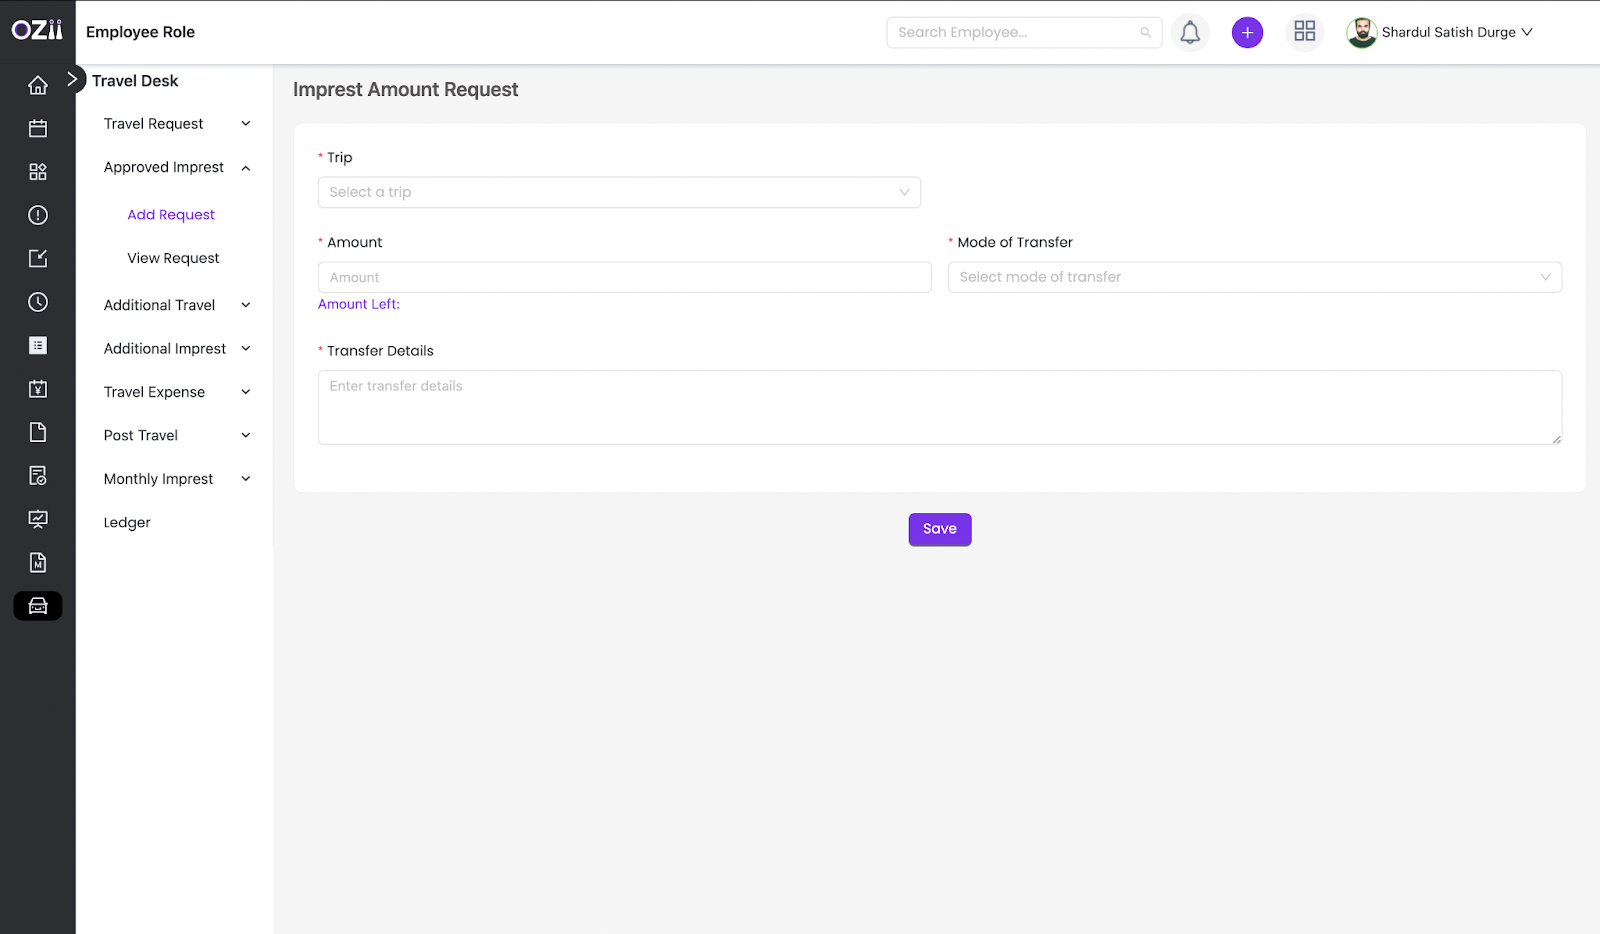
The Approved Imprest section enables you to request imprest amounts for your approved trips. This section guides you through selecting the relevant trip, specifying the amount needed (with the remaining amount displayed for your reference), choosing the mode of transfer, and providing your bank details. After saving your request, you can track its status on the View Imprest Amount page.
Imprest Amount Request
– Step 1: Locate & Select the Imprest Amount Request section on the sidebar of the page under subsection Approved imprest under section Travel Desk
– Step 2: Enter the following details on the form:
- Select Trip
- Specify Amount. ( remaining Amount will be displayed below accordingly )
- Select Mode of Trasnfer.
- Specify Your bank details in the texts box.
– Step 3: Once all details are finalized, the Employee can click on save to register the Imprest Amount Request. All the applied Imprest Amount Request and statuses can be seen on the View Imprest Amount page.
Additional Imprest
The Additional Imprest section allows you to request additional funds for ongoing trips when the initially approved amount is insufficient. This section will guide you through selecting the relevant trip, specifying the additional amount needed, and providing a justification for the extra funds. You’ll also learn how to select the transfer type and provide your bank details for receiving the imprest, ensuring you have the necessary funds to cover your travel expenses.
Additional Imprest Request
– Step 1: Locate & Select the Request section on the sidebar of the page under subsection Additional Imprest under section Travel Desk
– Step 2: Enter the following details on the form for Project details:
- Select Trip
- Specify Unit name.
- Specify Purpose of Visit.
- Select the Project according to your Unit selection
- Specify Total days of visit.
– Step 3: Enter the following details on the form for Imprest details:
- Add Project expenditure ( List of expenditure categories will be visible )
- Check box for Per day expenditure can be selected if applicable
- Specify Amount & Remarks
- ( Once all the expenditures are specified totals imprest details will be visible below )
- Specify Intial requested Amount.
- Select Trasnfer type.
- Specify Your bank details in the texts box.
– Step 3: Once all details are finalized, the Employee can click on save to register the Additional Imprest request. All the applied Additional Imprest request and statuses can be seen on the View Imprest Amount page.

Expenses
The Expenses section allows you to record and manage your travel-related expenditures for reconciliation and reporting. In this section, you’ll learn how to add expenses by selecting the relevant trip and project, specifying the expense date and expenditure head, providing a description, and entering the amount. Crucially, this section also covers how to upload the bill for each expense, ensuring accurate record-keeping and easy access to supporting documentation for each transaction. All recorded expenses can then be viewed on the View Expense page.
Add Expenses
– Step 1: Locate & Select the Add Expense section on the sidebar of the page under subsection expenses under section Travel Desk
– Step 2: Enter the following details on the form:
- Select Trip
- Select Project.
- Expenses can be added consecutively if applicable.
- Specify expense date.
- Specify Expenditure Head.
- Mention descriptions of the expense.
- Enter Amount.
- Upload bill of the mentioned particular expense
– Step 3: Once all details are finalized, the Employee can click on save to register the Expenses. All the Mentioned expenses can be seen on the View Expense page.

Post-Travel
The Post-Travel section is where you finalize your trip within the Travel Desk system by submitting a post-travel report. This section guides you through selecting the relevant trip, uploading or mentioning your tour report, and providing feedback on your travel experience. The form displays a breakdown of expenses and balances with respective approved amounts, and also allows for the addition of any further expenses. Completing this section is crucial for reconciliation and ensuring all travel-related information is accurately recorded.
Post-Travel Details
– Step 1: Locate & Select the Post Travel details section on the sidebar of the page under subsection Post travel under section Travel Desk
– Step 2: Enter the following details on the form:
- Select Trip
- Upload or mention Tour Report
- Provide Feedback
Biferecation and details of all the expenses and balances will be tabulaised below the form with respective approved amounts. Additional expenses can aslo be added here.
– Step 3: Once all details are finalized, the Employee can click on save to register the Post travel report. All Post travel reports can be seen on the View Post Travel details page.
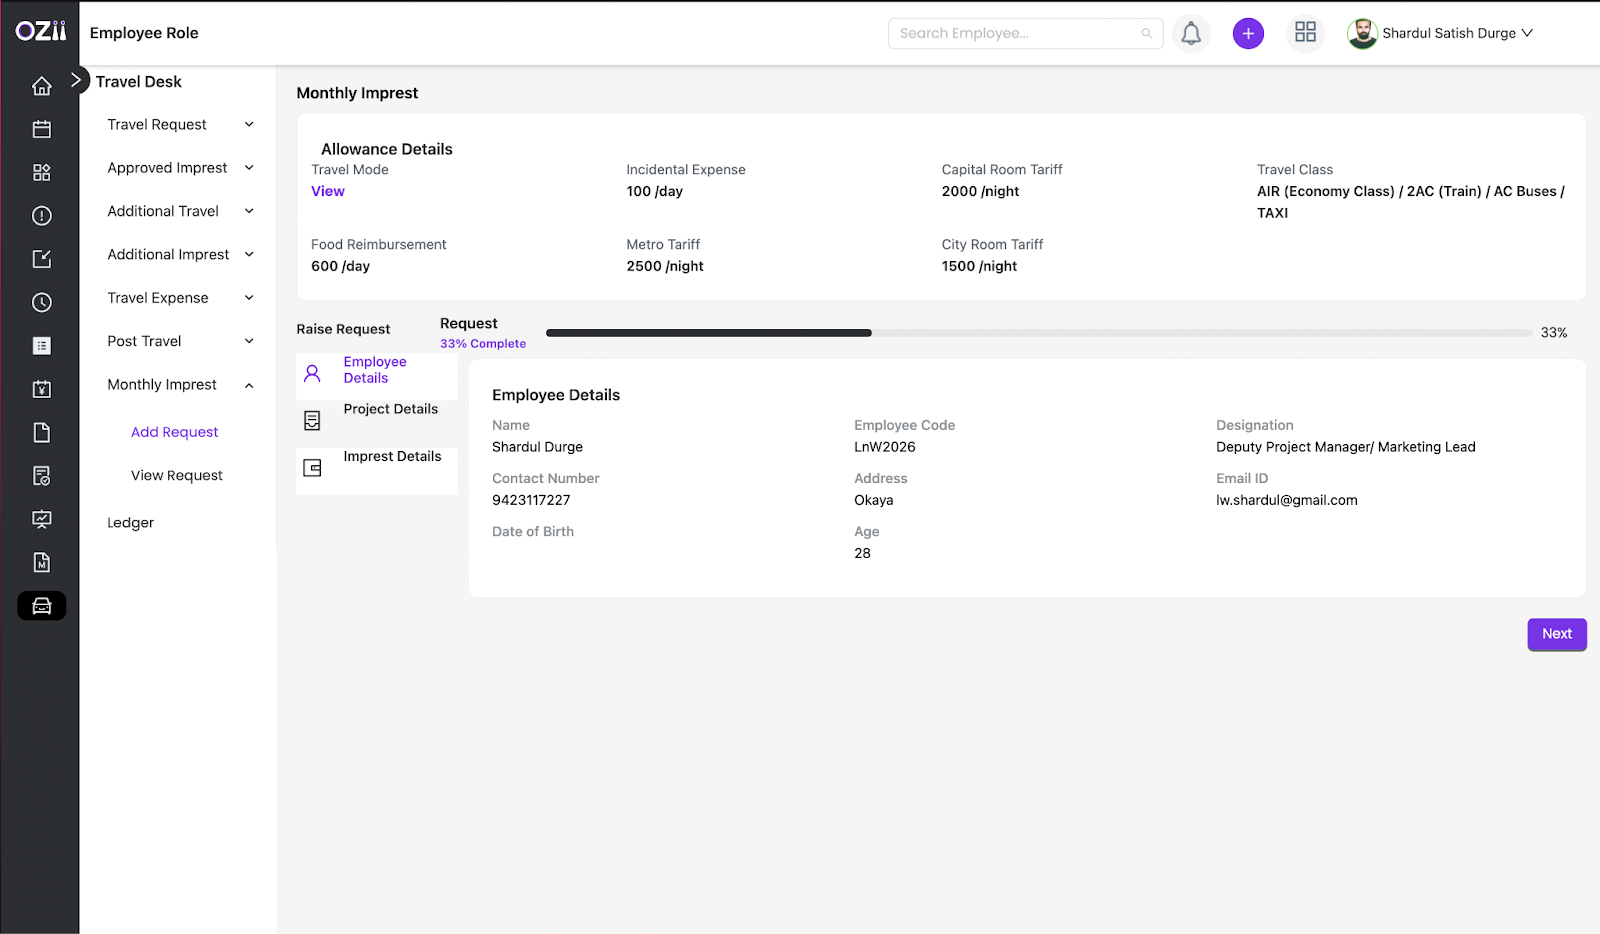
Monthly Imprest
The Monthly Imprest section allows you to request a recurring imprest amount to cover ongoing project-related expenses. This section guides you through specifying your unit and project details, the start and end dates for the imprest period, and the breakdown of project expenditures. You’ll also learn how to specify the initial requested amount, select the transfer type, and provide your bank details, ensuring all the necessary information is included for processing your monthly imprest request. Once submitted, you can track the status of your request on the View Imprest Request page.

Monthly Imprest Request
– Step 1: Locate & Select the New Imprest request section on the sidebar of the page under subsection Monthly Request under section Travel Desk
– Step 2: Employee details are pre defined and displayed on the page.Click next on employee details page.
– Step 3: Enter the following details on the form for Project details:
- Specify Unit name.
- Select the Project according to your Unit selection
- Specify Start date.
- Specify End Date.
– Step 3: Enter the following details on the form for Imprest details:
- Select Project expenditure ( List of expenditure categories will be visible )
- Check box for Per day expenditure can be selected if applicable
- Specify Amount & Remarks
- ( Once all the expenditures are specified totals imprest details will be visible below )
- Specify Intial requested Amount.
- Select Trasnfer type.
- Specify Your bank details in the texts boxes.
– Step 3: Once all details are finalized, the Employee can click on save to register the Monthly Imprest request. All the applied Monthly Imprest and statuses can be seen on the View Imprest Request page.
Employee ledger
The Employee Ledger section provides a comprehensive overview of your travel and imprest-related activities. In this section, you can view all your travel and imprest reports. Furthermore, you can select a specific trip to access detailed information, including Expense History and Imprest History, providing a complete record of your travel-related transactions.
– Step 1: Locate & Select the Employee Ledger section on the sidebar of the page under section Travel Desk
All the employee travel and imprest reports can be seen on the Employee ledger
– Step 2: Select any pirticular trip to access details such as Expense history & Imprest history.
You’ve now navigated through the key features of the Travel Desk dashboard using this guide. By following these instructions, you can efficiently submit travel requests, manage imprest amounts, record expenses, and complete post-travel reports. Utilizing the Travel Desk effectively ensures smooth processing of your travel-related activities, accurate financial tracking, and compliance with company policies. If you have any further questions, please reach out to the support team for assistance.
Last modified: February 14, 2025