This user guide is designed to provide comprehensive instructions & Explainations for effectively utilizing the HRMS Settings features. It covers essential tasks & Functions such as adding locations, holidays, shifts, and managing leave and appraisal settings to streamline & boost HR operations.
Location
In the Location section, users can easily add new office locations by specifying the location name and code, ensuring efficient management of organizational sites.
1. Add location
– Step 1: Locate & Select the Add location section on the sidebar of the page under Subsection location.
– Step 2: Enter the following details:
- Specify Location Name
- Specify Location Code
– Step 3: Once all details are finalized, HR can click on save to register the particular office location, all the saved locations can be viewed in View location under the same subsection.
Holiday
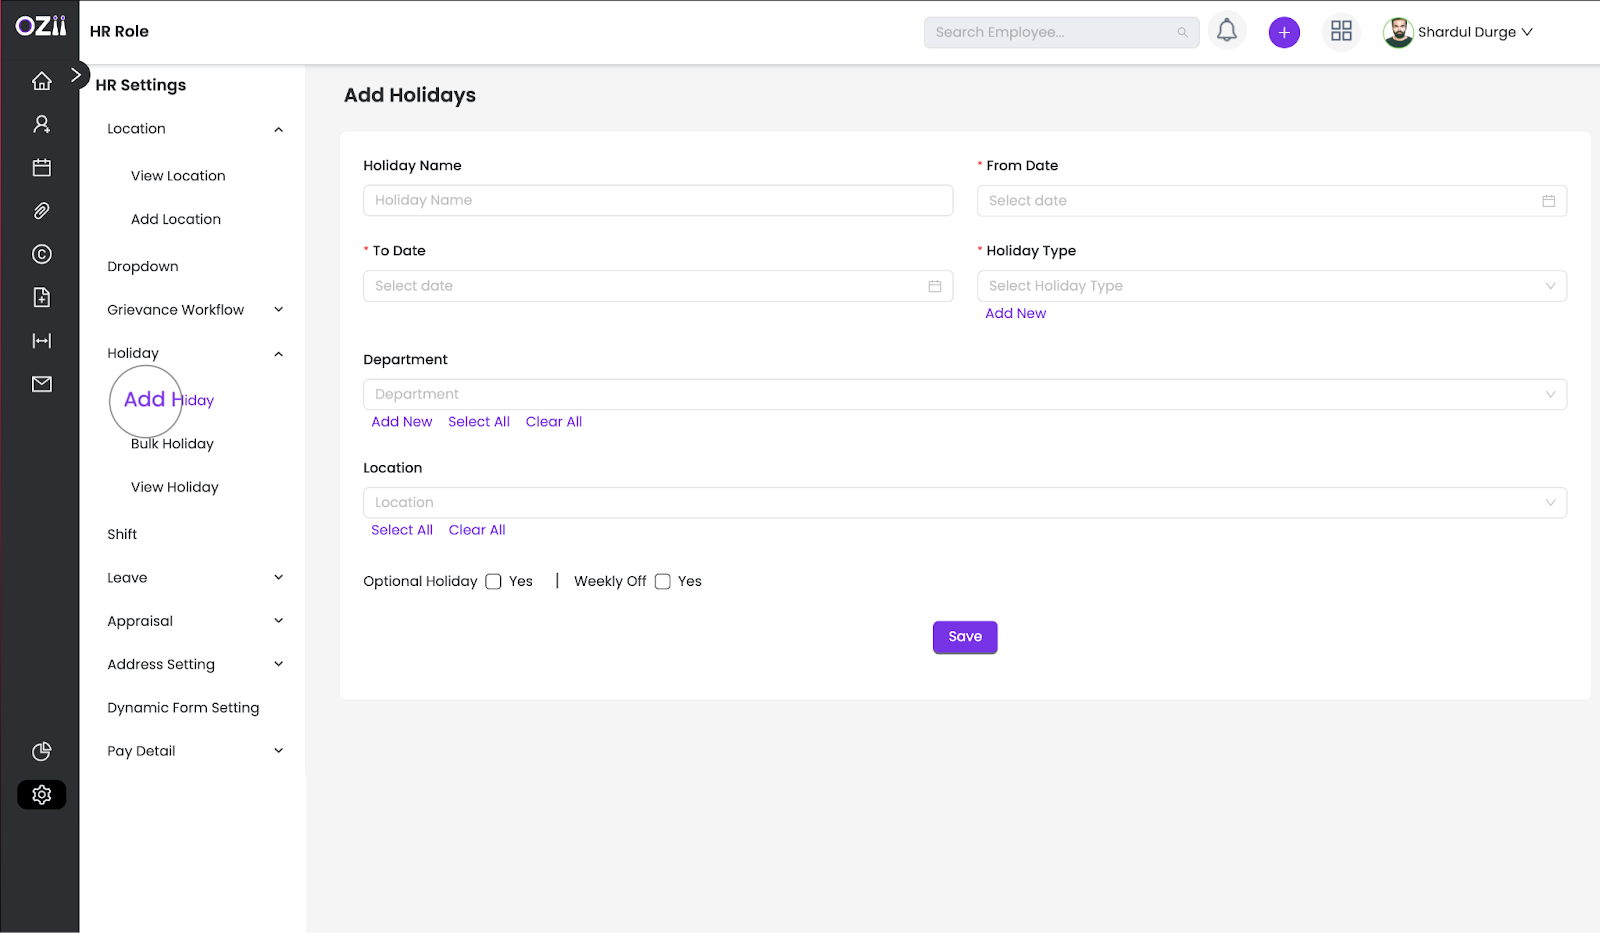
In the Holiday section, users can efficiently add holidays by specifying the holiday name, dates, type, applicable departments, and office locations, ensuring accurate holiday management across the organization.
1. Add holiday
– Step 1: Locate & Select the Add Holiday section on the sidebar of the page under Subsection Holiday.
– Step 2: Enter the following details:
- Mention the Holiday name.
- Specify the Holiday start date and end date.
- Specify Holiday type, Holiday type can also be added from the add new action button.
- Select the applicable department for the holiday, you can select all and there is an option to add a new department as well.
- Select the Office Location applicable to the holiday.
- Optional check box to select if the particular holiday will be an Optional holiday.
– Step 3: Once all details are finalized, HR can click on save to register the particular Holiday, all the saved locations can be viewed in View Holiday under the same subsection.
2. Bulk holiday
– Step 1: Locate & Select the Bulk Holiday section on the sidebar of the page under Subsection holiday.
– Step 2: Enter the following details:
- Specify Holiday start date and end date.
- Specify Holiday type, Holiday type can also be added from the add new action button.
- Select the applicable department for the holiday, you can select all and there is option to add new department as well.
- Select Office Location applicable to the holiday.
- Specify checkbox for Bulk Holiday choices ( All Saturday, Odd Saturday, Even Saturday, All Sunday )
- Specify Description for the bulk holiday.
– Step 3: Once all details are finalized, HR can click on save to register the particular Bulk Holiday, all the saved holidays can be viewed in View Holiday under the same subsection.
Shift
In the Shift section, users can add and manage shift details by specifying parameters such as shift name, in-time, out-time, and applicable hours for full and half days, ensuring effective scheduling within the organization.
1. Add Shift
– Step 1 : Locate & Select the Shift section on the sidebar.
– Step 2 : Shift page will display all the Shift details ( In-time, out-time, Late in, Early out, Full day and half day in hrs, Full day & Half day in hr applicable for Comp offs, ) Existing can be edited or deleted form the action buttons on the far right of the details table.
– Step 3: Enter the following details for adding a shift:
- Specify (Shift name In-time, out-time, Late in, Early out, Full day and half day in hrs, Full day & Half day in hr applicable for Comp offs)
– Step 4: Once all details are finalized, HR can click on save to register the Shifty, all the saved shifts can be viewed on the same page.

Leave
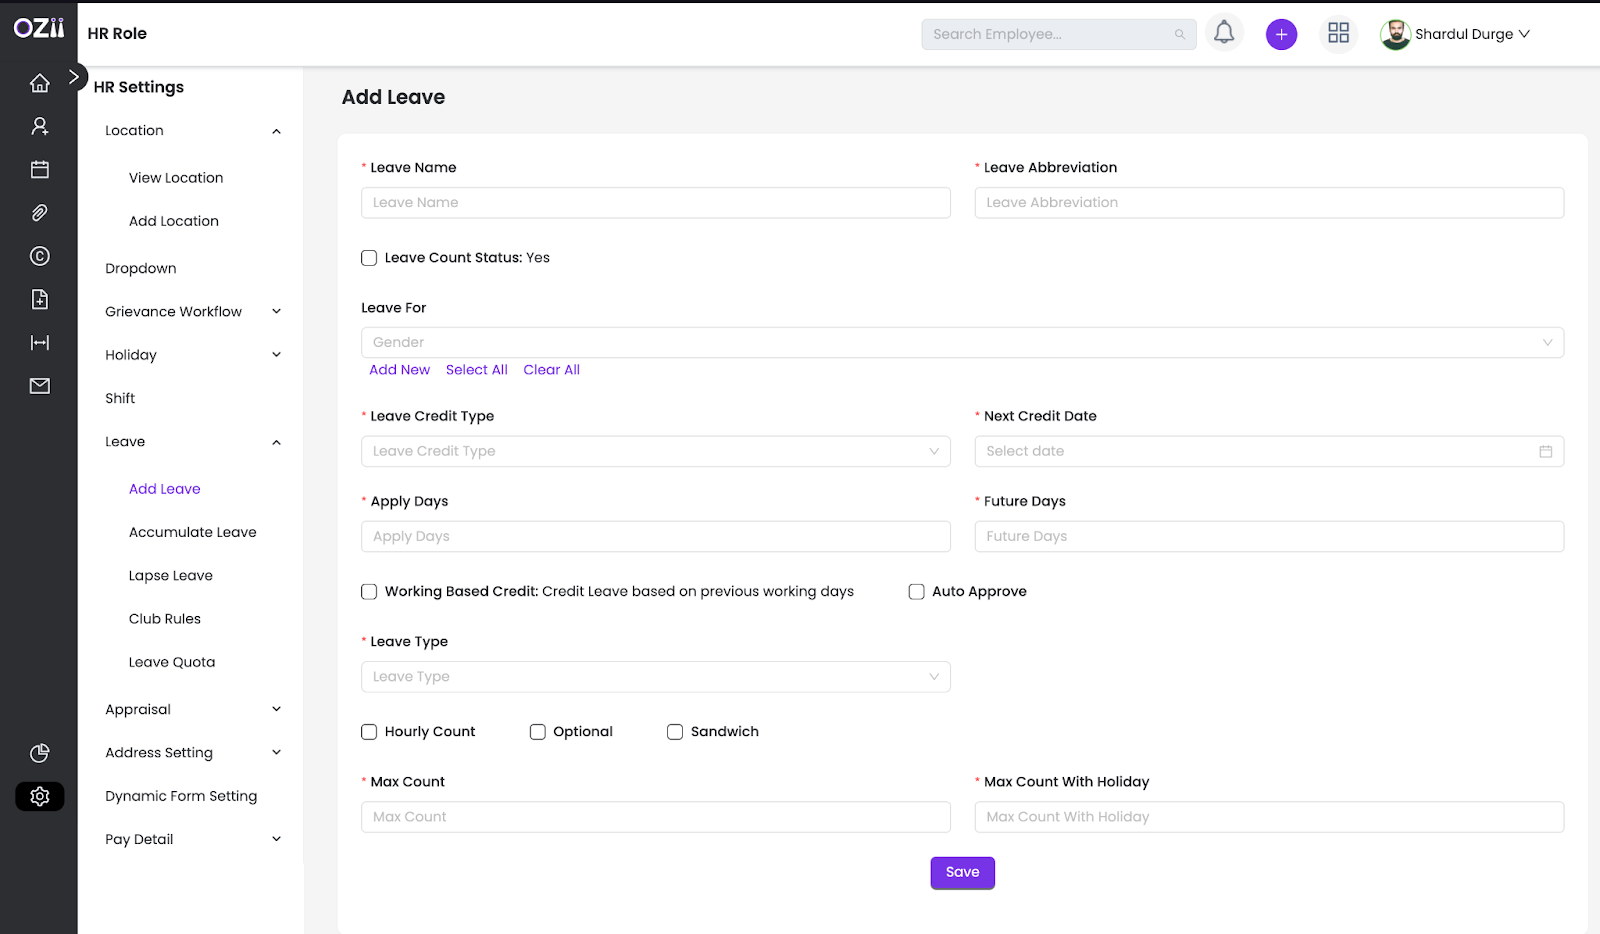
In the Leave section, users can add and manage leave types by specifying details such as leave name, applicable groups, credit type, and thresholds for application, ensuring a structured leave management system.
1. Add Leave
– Step 1: Locate & Select the Add Leave section on the sidebar of the page under Subsection leave.
– Step 3: Enter the following details for adding a shift:
- Specify Leave name & Abbreviation
- Optional check box for Leave count status is available.
- Specify the if the leave applicable for ( Male, Female & Others ).
- Specify Leave credit type tenure ( Monthly, quarterly, Half yearly & Yearly ).
- You can specify the credit date in the Next credit date field.
- Specify Apply days as a threshold period someone can apply & record on the erp after availing the leave beforehand.
- Specify Future days as a threshold period for someone cna apply and record on the erp before availing the leave for the future.
- Option check boxes for working based crediting & Auto Approval
- Specify leave type ( Lapsing or Accumulative )
- Option checkboxes for, hourly count Sandwich or Optional Leave trait.
- Specify Max Count for maximum number of leaves to be allotted, and Max Count holiday for the maximum number of leaves to be allotted along with holidays.
– Step 4: Once all details are finalized, HR can click on save to add the new leave.All the leaves can be viewed in accumulate leave and lapse leaves on the sidebar of the same section.
2. Club rules ( Leave clubbing rules )
– Step 1: Locate & Select the Club rules section on the sidebar of the page under Subsection leave.
– Step 2: Enter the following details for Specifying club rules:
- Specify Leave first type
- Specify Leave type 2
( these two leaves once selected won’t be able to be clubbed together. ) - Optional Check box Allowing clubbing in extreme rules.
– Step 3: Once all details are finalized, HR can click on save to add the new leave clubbing rule. All club rules can be viewed in the view club rule section.
3. Leave quota
– Step 1: Locate & Select the Leave Quota section on the sidebar of the page under Subsection Leave.
– Step 2: Enter the following details for Specifying Leave quota:
- Select the specific leave to be allotted to a quota.
- Select the location, Type of employment, Category of employment & designation for whom the leave quota is associated.
- Specify the max possible number of leave to be granted to an employee throughout the tenure at a Number of days.
– Step 3: Once all details are finalized, HR can click on save to add the new leave quota. All leave quotas can be viewed in the view leave quota section.
Appraisal
In the Appraisal section, users can manage appraisal processes by specifying assessment years, unlocking appraisals, setting parameters, and adding comments to streamline employee evaluations.
1. Assessment year
– Step 1: Locate & Select the Assessment year section on the sidebar of the page under Subsection Appraisal.
– Step 2: Enter the following details for Specifying Assessment year:
- Select name for the assessment year.
- Specify Start date and End date for the assessment year period.
- Specify Nature of the assessment year tenure ( Monthly, Quarterly, Half yearly & Yearly )
– Step 3: Once all details are finalized, HR can click on save to add the new Assessment year. All new assessment years can be viewed in the view assessment year section.
2. Appraisal unlock
– Step 1: Locate & Select the Appraisal Unlock section on the sidebar of the page under Subsection Appraisal.
– Step 2: Enter the following details for Specifying Appraisal unlocking details:
- Select the specific appraisal year.
- Specify the assessment duration
- Specify Unlocking start date and End date
- Select the applicable department, category of employees & Designation.
– Step 3: Once all details are finalized, HR can click on save to add the new Appraisal unlock details. All details saved can be viewed in the view appraisal unlock section.
3. Appraisal Parameters
– Step 1: Locate & Select the Appraisal Parameters section on the sidebar of the page under Subsection Appraisal.
– Step 2: Enter the following details for Specifying Appraisal parameters:
- Specify the parameter name.
- Select the appraisal year for that parameter.
- Specify Minimum and maximum marks for the parameter.
- Select the applicable department, category of employees & Designation.
– Step 3: Once all details are finalized, HR can click on save to add the new Appraisal parameters. All details saved can be viewed in the view appraisal parameters section.
4. Appraisal Comments
– Step 1: Locate & Select the Appraisal Comments section on the sidebar of the page under Subsection Appraisal.
– Step 2: Enter the following details for Specifying Appraisal comments:
- Specify the comment name.
- Select the appraisal year for that comments.
- Select the applicable department, category of employees & Designation.
– Step 3: Once all details are finalized, HR can click on save to add the new Appraisal comments. All details saved can be viewed in the view appraisal comments section.
5. Self Appraisal unlock
– Step 1: Locate & Select the Self Appraisal Unlock section on the sidebar of the page under Subsection Appraisal.
– Step 2: Enter the following details for Specifying Appraisal unlocking details:
- Select the specific appraisal year.
- Specify the assessment duration
- Specify Unlocking start date and End date
- Select the applicable department, category of employees & Designation.
– Step 3: Once all details are finalized, HR can click on save to add the new Appraisal unlock details. All details saved can be viewed in the view self-appraisal unlock section.
Address Settings
In the Address Settings section, users can manage country and state entries by specifying names and codes, ensuring accurate geographical data for organizational records.
1. Country
– Step 1: Locate & Select the Country section on the sidebar of the page under Address settings.
– Step 2 : Enter the country name & Save. All countries can be viewed in View country of the same section.
2. State
– Step 1: Locate & Select the State section on the sidebar of the page under Address settings.
– Step 2 : Enter the country name, State Name, GST state code & Save. All states can be viewed in View state of the same section.
Dynamic Form Settings
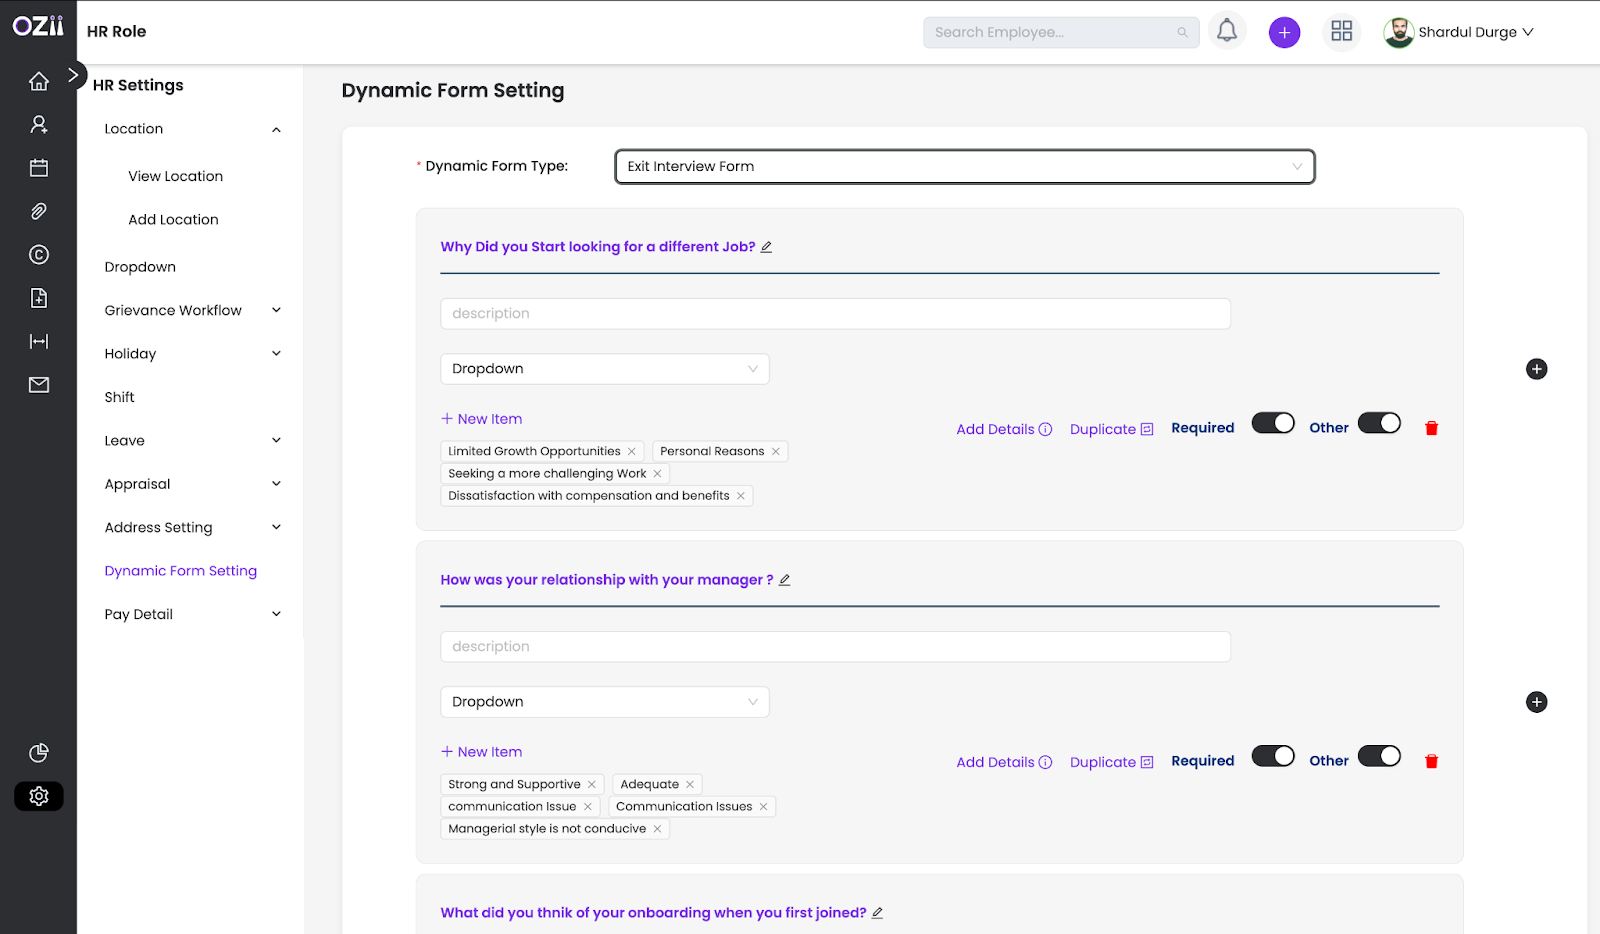
In the Dynamic Form Settings section, users can customize forms by editing label fields, adding details, duplicating fields, and setting mandatory options to enhance data collection flexibility.
1. Dynamic Form setting
– Step 1: Locate & Select the Dynamic form setting section on the sidebar.
– Step 2: Select the dynamic form to be edited.
– Step 3: A form will appear, Name the label field. You have the option to add Details & Duplicate the field.
– Step 4: Select the optional toggle to make the field mandatory
– Step 5: Select the field type and save the field.
Last modified: February 12, 2025